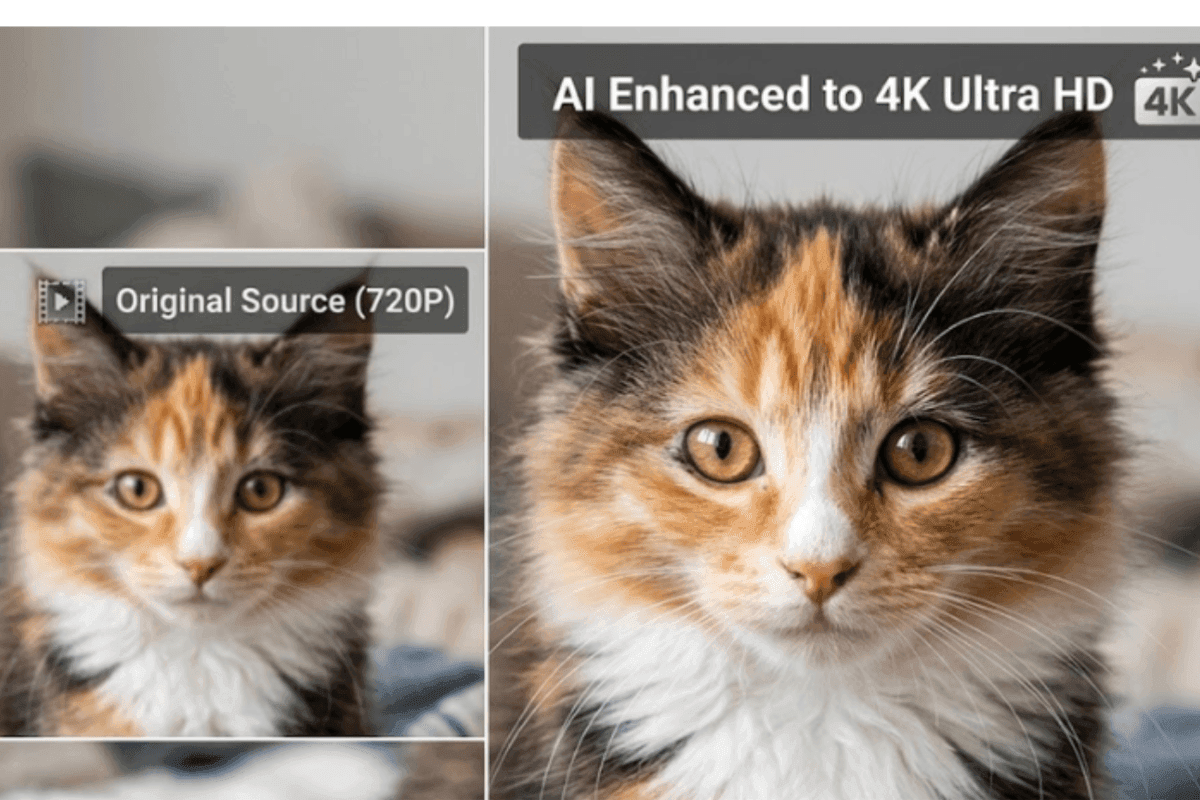
Old videos often come in SD quality. They look soft, a bit blurry, and just don’t hold up to the sharpness of modern screens. And that becomes a real issue when you want to breathe new life into old content that’s going to be used on social media, in ads, or on your website.
HD has basically become the default now, so people notice right away when visuals aren’t clear. Blurry or low-quality footage can take away from even strong content and make it feel a bit dated. The good part is there’s no need to start over with new recordings.
Old SD videos can be upgraded to HD with a simple process. This guide breaks it down in a clear way, so you know what happens at each step and how to get it done without confusion.
When scaling a video from SD to HD, you’re essentially asking something to fill in gaps of information that just aren’t there in the original file. A standard 480p video typically contains around 307,200 pixels per frame – not a lot.
While an HD 1080p frame has more than double that – a whopping 2 million. For a long time, the way software used to scale the image was just to duplicate what was already there – which looks pretty rough and often ‘blocky’. Newer tools are now using clever algorithms that can actually predict what detail should be there and make some educated guesses about the missing bits.
The upshot of which is that edges get restored, noise is reduced and textures end up looking a lot more stable. For anyone working in e commerce or just wanting to keep some old footage looking good – all of this is pretty important to keep things looking as good as they possibly can.
Can You Really Convert SD to HD?
Yes, but there is a limit. Upscaling increases resolution. It adds pixels to the video. Basic tools stretch the image. That often makes things worse.
Modern tools use AI to rebuild missing details. They take a close look at each frame, and with a bit of magic, make things clearer. The end result is a good approximation of what HD looks like but still, won’t be the same as footage that was shot in HD from the get go. The goal here is to improve things a bit, not try and make it perfect.
Best Approach to Convert SD to HD
 If you want better quality without spending hours editing, AI tools are the best option.
They handle:
- Resolution increase
- Noise reduction
- Detail recovery
You can use a dedicated video quality enhancer or a video upscaler, depending on your needs. Currently, Vmake is one of the best AI tools in the market to convert SD to HD.
Vmake: Smart Upscaling from SD to HD
Vmake is an AI-based video enhancement tool built for quick upscaling and cleanup. Its focus is on nailing the video quality without needing you to be an editing pro (and who has the time and patience for that). You just need to upload a clip, pick what you want it to come out as, and let the system get on with it.
Under the hood it is using AI models to perk up the details, reduce any noise, and give the overall picture a bit of a polish. Since it runs online, there is no need to install heavy software. That makes Vmake a lifesaver for content creators, marketers and anyone else working with older footage who needs to get clean, fast results without diving into a complicated workflow. Some of its key features include.
 Key enhancement modes include:
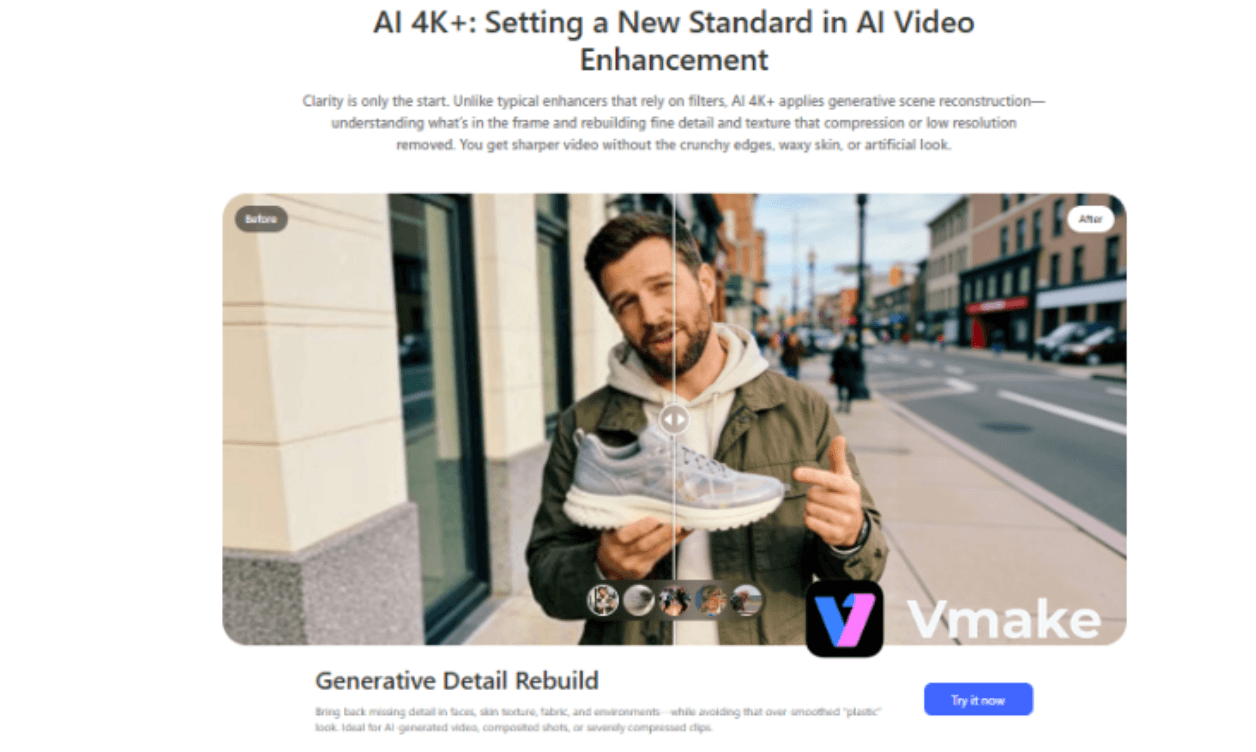
- De-AI Mode: This one gives AI-generated clips a more natural feel by dialling down the over-smoothing, fixing those annoying repeated textures, and getting the light and colour levels just right – all while keeping artefacts down to a minimum
- Portrait Restoration Mode: This mode is a real winner – it not only improves facial detail and hair clarity but also gives skin a more natural texture – and to top it all off it reduces that awful flicker and avoids that weird, “plastic” smooth look.
Product Enhancement Mode: If you’re making product videos or ads, this mode’s your best bet – it sharpens up text and graphics, corrects those pesky colour shifts and keeps material details looking crisp and clear. - Low-Light & Night Repair Mode: This one’s a lifesaver – it cleans up noise, brings back detail in the shadows, and makes a real difference in dark or uneven lighting situations.
- Anime & Animation Mode: Enhances color and sharpness while keeping the original art style stable across frames.
Step-by-Step Method to Convert SD to HD Using Vmake
Step 1: Getting Your Footage Ready
Make sure your SD file is in a format that VMAKE will accept – MP4, MOV, or AVI. While the video quality enhancer can correct a lot of visual problems, but the starting file still matters. If you begin with the least compressed version of your SD footage, the final HD result usually looks much cleaner and more detailed.
Step 2: Uploading to the Platform
Head over to the Vmake dashboard and upload your file. You can just drag it and drop it right into the interface – it’s that easy. And if you’re updating a whole library of product videos, the tool supports batch processing, making it a whole lot simpler.

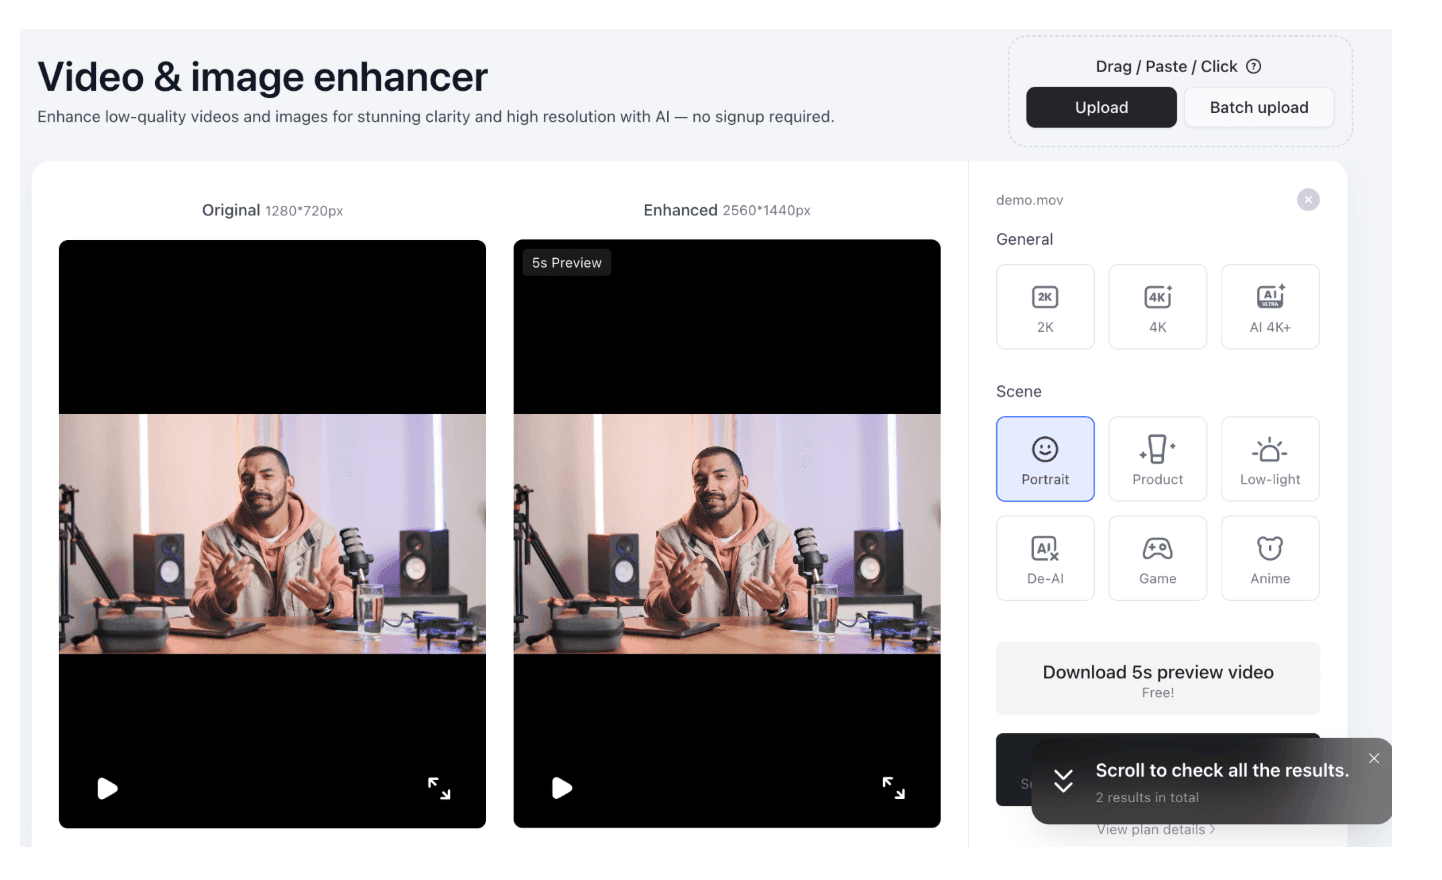
Step 3: Select Enhancement Parameters
After uploading your file, the video upscaler begins processing it in the background. It scans each frame to understand detail, texture, and movement. From there, you can pick the output quality you want. Such as 1080p or 4K, depending on how sharp you want the final video to look.
Step 4: Preview & Fine-Tune
Vmake generates a side-by-side preview of the before and after footage. Take a close look at areas with lots of contrast, like text or sharp edges – this is where the AI will be working to get rid of “mosquito noise” and other artifacts that often come with old SD encodes.
 Step 5: Exporting the Final File
After the processing is complete, download the HD version. The software ensures the frame rate remains consistent with your original file to avoid motion jitter.
Comparison: SD vs. HD Output
The following table illustrates the technical shifts that occur during the upscaling process on the platform.
| Feature | Standard Definition (SD) | High Definition (HD) |
| Pixel Count | 720 x 480 | 1920 x 1080 |
| Visual Clarity | Noticeable grain and blurring | Sharp edges and clear textures |
| Bitrate | Low (approx. 2-5 Mbps) | High (approx. 8-20 Mbps) |
| Display Compatibility | Best for old CRT monitors | Optimized for smartphones and 4K TVs |
| Viewer Retention | Low due to perceived poor quality | High; appears professional and modern |
Why Use Vmake Instead of Mobile Apps
 Many mobile apps can upscale video. Still, they rely on basic processing.
Here is where Vmake stands out:
- AI handles most of the work
- Better detail recovery
- Cleaner output
- No complex editing
Other apps can upscale videos. You still need to adjust settings manually. Results depend on your edits. Vmake focuses on output quality instead of editing steps. That saves time, especially for repeated tasks.
Tips to Get Better Results
Small adjustments can make a world of difference in the quality of your output. Always start with the original file if you can – Compressed vids tend to lose some of that important detail. Don’t push resolution too far – it’s a rare trick to move from rock bottom to 4K in one go and still end up with something that looks good.
If your footage is noisy or super compressed, do a bit of enhancement before you try upscaling it. And another thing – brighter videos tend to process a lot better, so think about how you’re lighting things. Don’t be afraid to try a few settings out instead of settling on the first one that you see & get a result from.
Common Mistakes to Avoid
Many users expect instant perfect results. That leads to poor output.
Here are a few mistakes to watch:
Upscaling low-quality clips too much
Using already compressed videos
Skipping preview before export
Choosing wrong settings
Each step affects the final result.
Wrapping Up
Converting SD videos to HD is no longer complicated. Tools have improved a lot. What once required advanced editing can now be done in a few steps. The key is choosing the right method. Basic upscaling works for quick fixes. Manual editing gives control but takes time. AI tools offer a balance of speed and quality. Vmake fits well in that space. To get started, try a few clips and compare results across different methods. Small tests often show what works best for your content.
Some people read for free. A few choose to support. If you found TelecomTalk useful, you can help keep us running.


 If you want better quality without spending hours editing, AI tools are the best option.
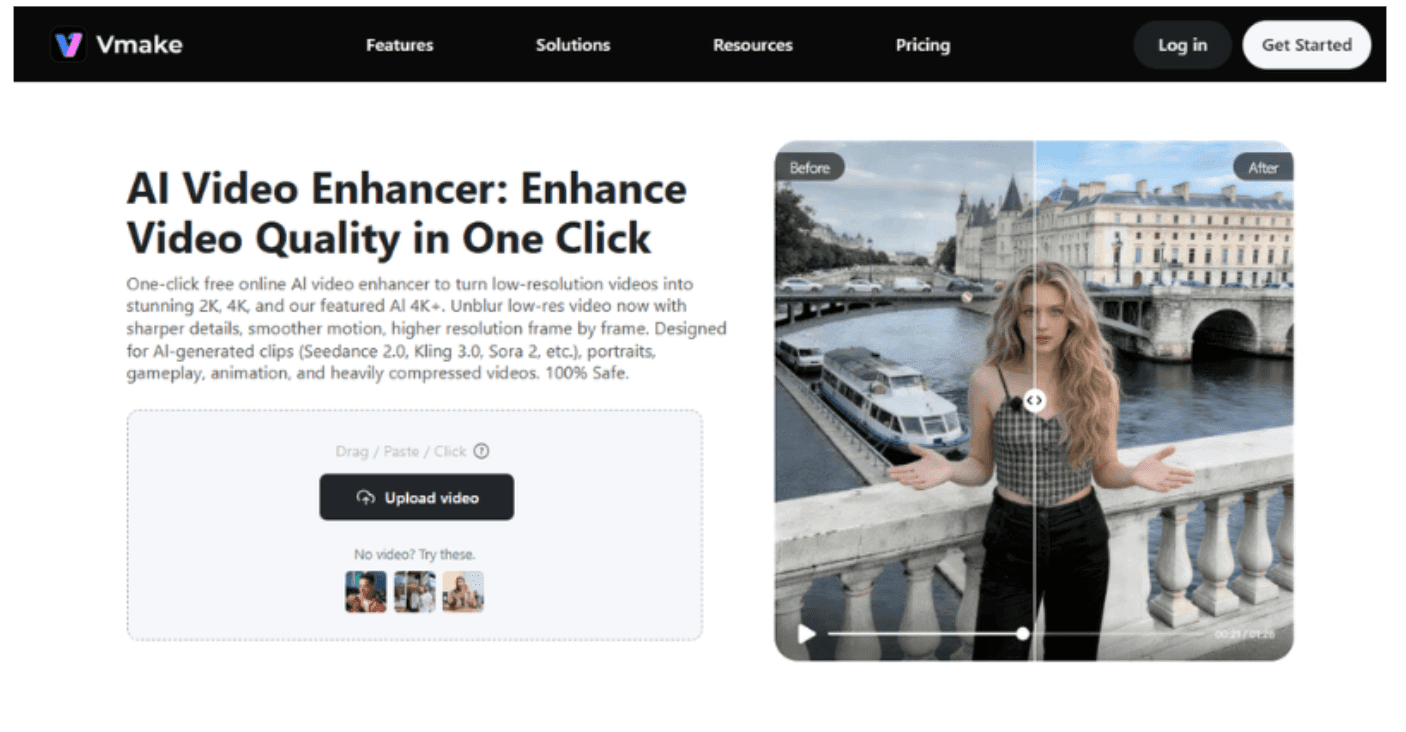 Key enhancement modes include:
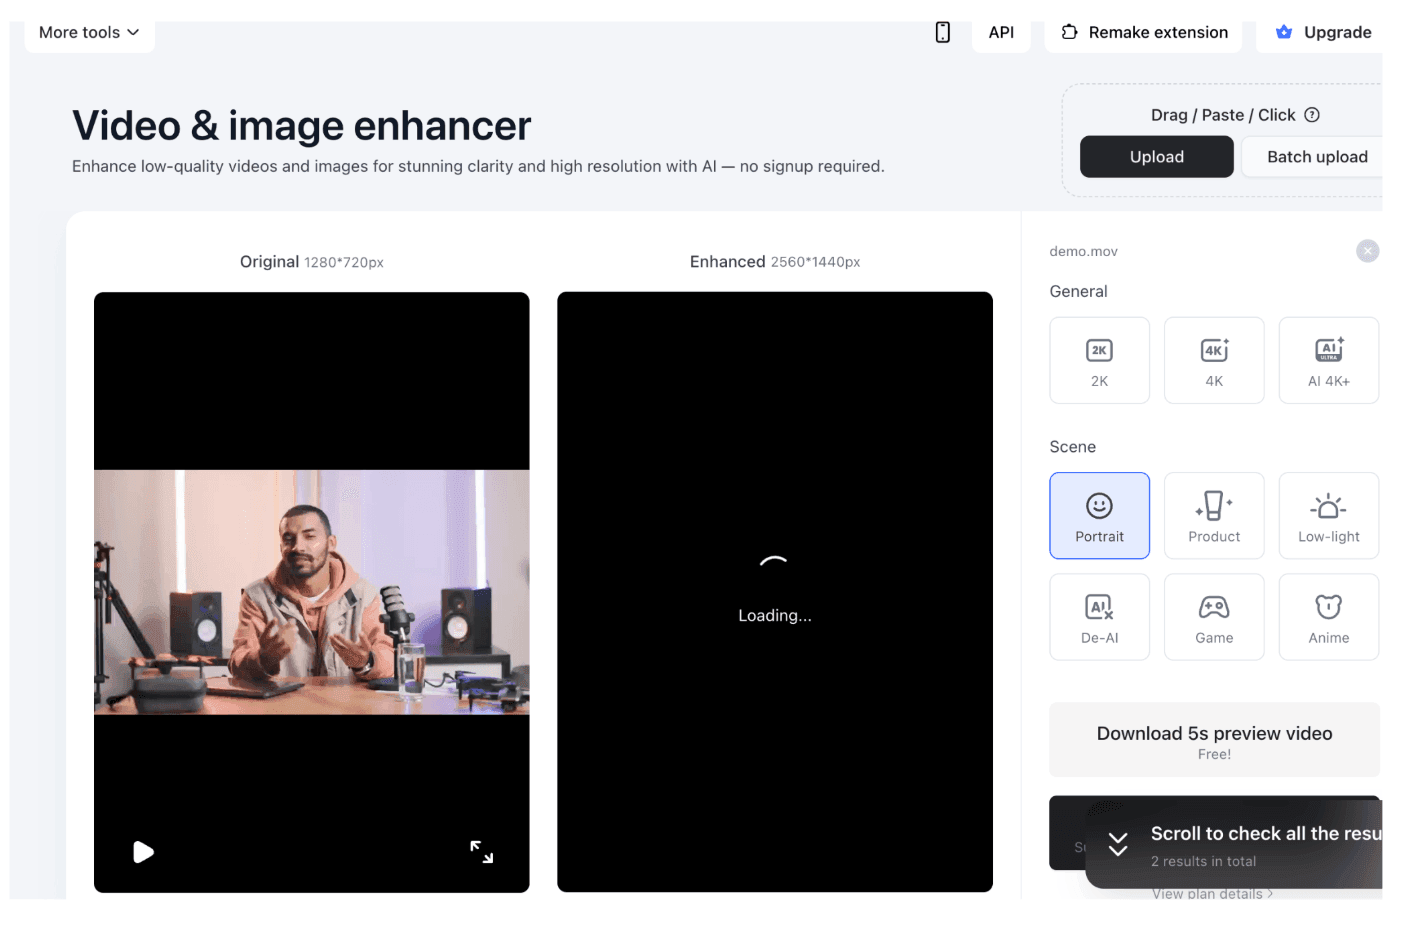
 Step 5: Exporting the Final File
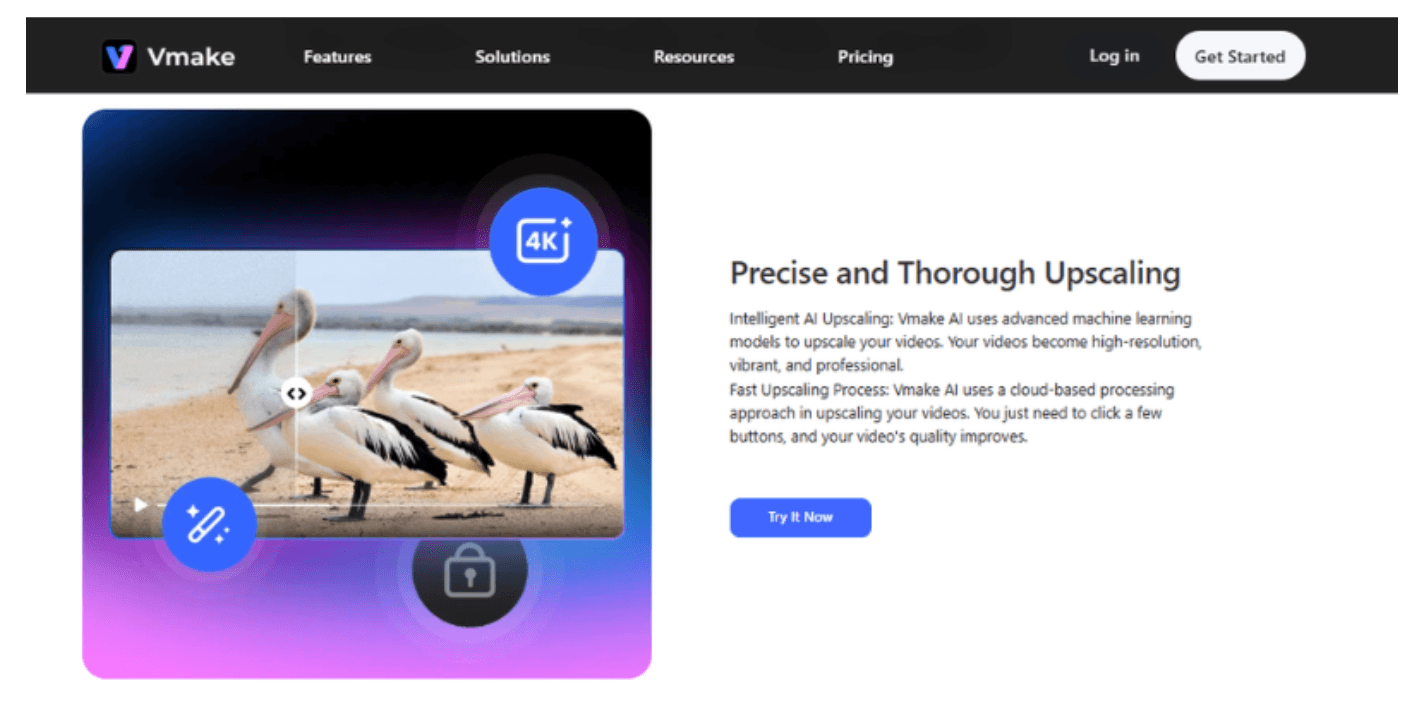 Many mobile apps can upscale video. Still, they rely on basic processing.


