With the advent of smart devices and the resulting app ecosystem Wi-Fi routers have become commonplace in every household. Wi-Fi routers are a great way to share your high speed internet connection with multiple smart devices like phones, tablets, eBook readers and even laptops.
Tech savvy individuals have been using different third party tools and sometimes Operating System's built in tools to share their wired internet connectivity without actually investing in a Wi-Fi router. On Windows, Connectify is one of the widely used applications which can turn your laptop into a Wi-Fi hotspot. Connectify's free version is ad-ridden, enforces time limits and is limited to Etherent or Wi-Fi networks. The paid version removes such limitations and can share internet from 3G/4G networks as well.
Today we bring to you a detailed step-by-step guide on configuring your Wi-Fi enabled Windows/ Ubuntu laptop as a hotspot using your wired internet connection.
Common Steps -
- Ensure that you are connected to internet as normal
- Turn on the hardware switch on your laptop to enable Wi-Fi
On Windows
- Open Network connections and make a note of available connections

- Invoke Command Prompt as Administrator - to do this search for cmd on the start screen / menu, right click on the cmd icon and click on 'Run as Administrator'
- Now run the following command to define a new hotspot. This step needs to be performed only once on a computer. ssidname and passphrase can be anything but make sure that you use a strong passphrase
netsh wlan set hostednetwork [ssid=]<ssidname> [key=]<passphrase>
- To start the new hostednetwork run this command. This needs to be run every time you power on your machine. Creating a startup script is an option but in order to keep things simple we are not explaining that here.
netsh wlan start hostednetwork
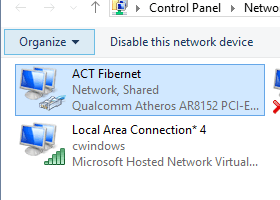
- This will add a new connection under 'Network Connections' with the ssidname. In my case it was Local Area Connection 4* cwindows.

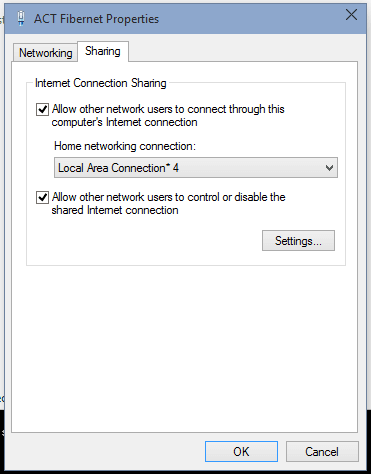
- Now open your primary connection's properties (in my case ACT Fibernet), go to sharing tab, enable sharing and choose the newly added connection. Click OK.

- Your primary connection would show the text 'Shared' now

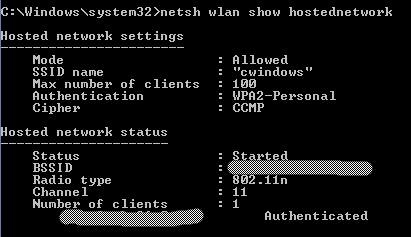
- You can also check the status of the hostednetwork with this command
- An optional step would be to stop the hostednetwork when you are done
netsh wlan stop hostednetwork
Your phone or any smart device will be able to detect the availability of this connection. Provide the password and your device will be online!
On Ubuntu
On Ubuntu the hotspot feature is not as trouble free as in the case of Windows. While things work out of the box in Windows on the same laptop (dual-boot configuration), you might face issues in Ubuntu as in frequent interruptions etc. This is particularly noticeable if you try WhatsApp Web! Now coming to the setup procedure -
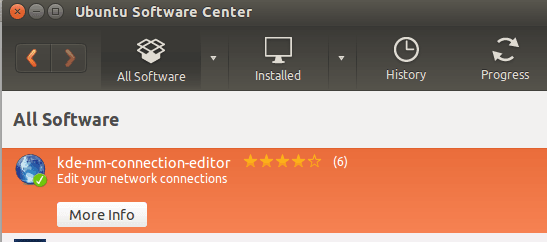
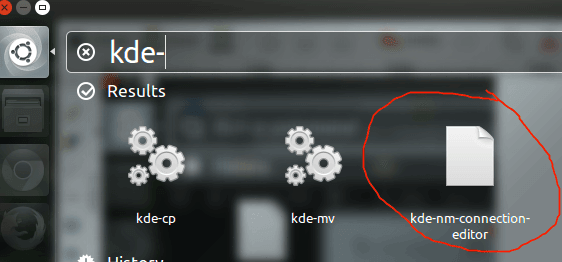
- Install kde-nm-connection-editor from Ubuntu Software Center
- Once it is installed press Alt+F2 to invoke the installed utility
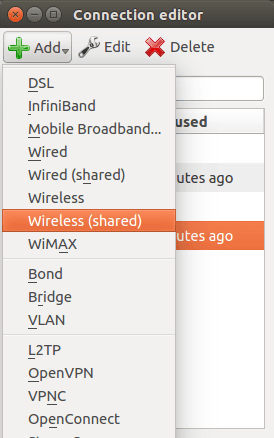
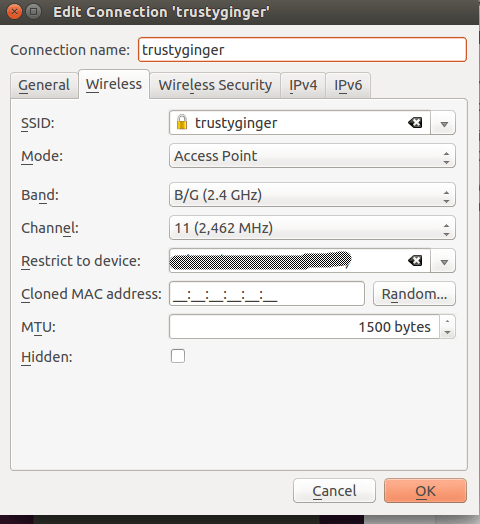
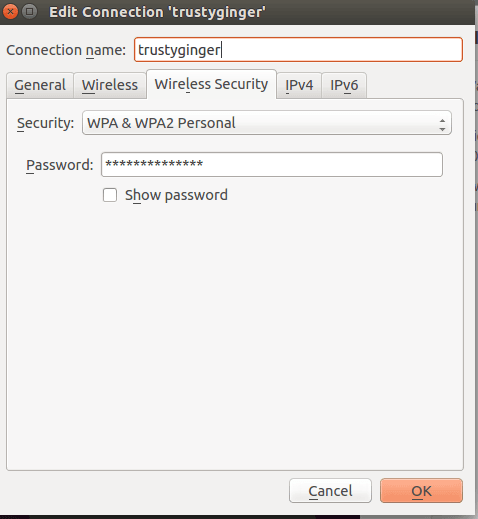
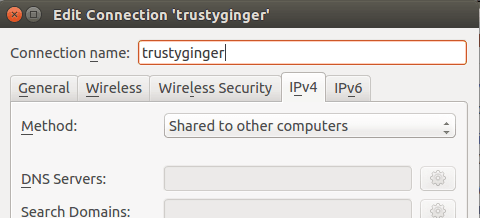
- After launching the utility follow the below screenshots to configure your hotspot. You can choose any connection name.
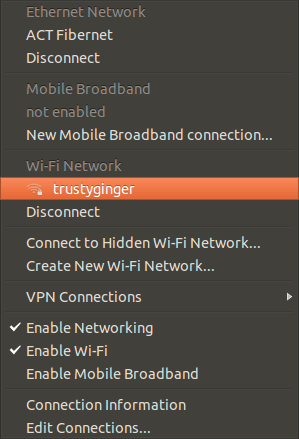
We would also suggest you to experiment with different channels as at times channels 1 or 6 worked out better than channel 11. After performing the above steps Ubuntu's network manager will show a new connection as below -
In case it is not shown use "Connect to Hidden Wi-Fi Network" option to connect. Your phone or any smart device will be able to find the laptop with ease.
Let us know your experience in sharing internet over Wi-Fi to personal devices through comments.


